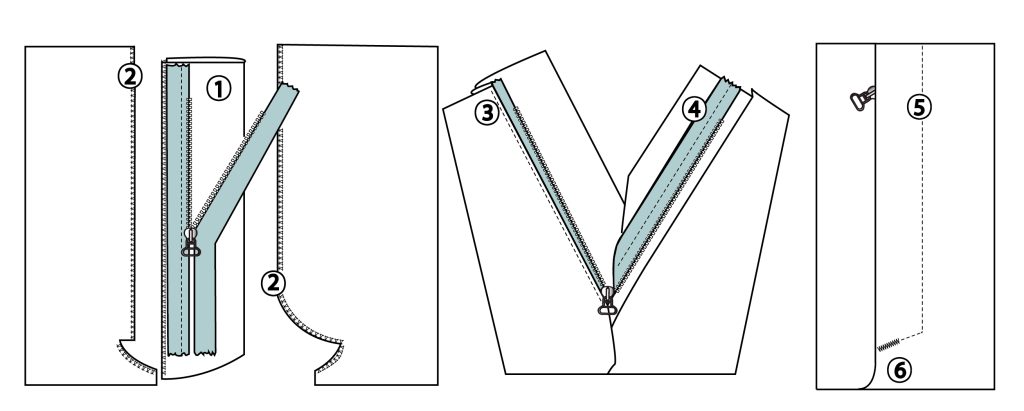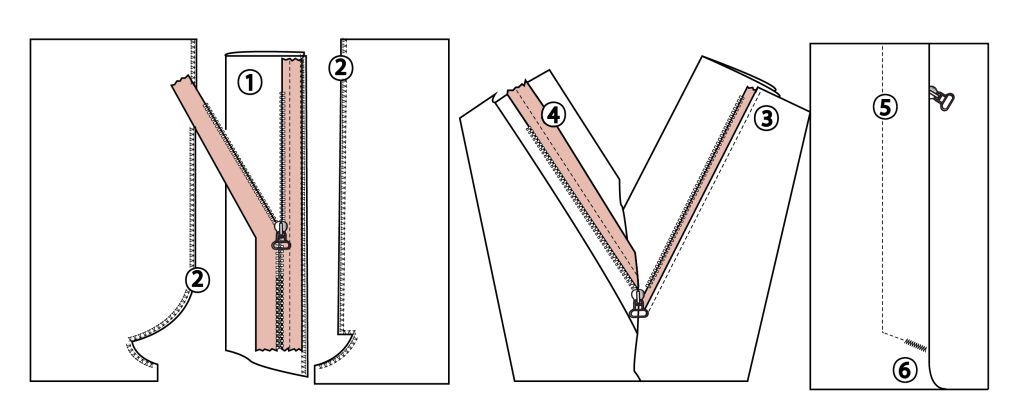
Time for some instructions!
Struggling with the zipper insertion? To help you out we give you easy instructions with instructional drawings about how to insert a zipper.
To get the best possible result, we recommend you to the following instructions; always use the zipper foot of the sewing machine and set your neelde to the left or right position, so you can stitch exactly along the theeth of the zipper.
1. Fold the zip underlap and bind. Stitch one zip ribbon on the underlap.
2. Bind the crotch seam and sew the crotch seam up to the split mark.
Be aware of the front centre line, it must meet. Iron the widest folded side flat at the front centre mark.
3. The fold at line 3 is 5mm past the front centre mark. Place the underlap to which the zip is fastened so that the teeth are against the realigned fold and stitch the seam on the underlap.
4. Close the zip and place the front centre marks on top of one another. Pin the other side of the zip ribbon, but sew it only onto the wrong side of the overlap. This is easiest when the zip is open.
5. Close the zip again and top stitch on the right side. Be careful that you don’t also stitch the underlap. Fold it to one side when doing so.
6. Secure the bottom of the zip with a zig-zag. This also secures the underlap.